How to Install a Kitchen Faucet
Add style, update your kitchen, and make everyday tasks easier with a new faucet.
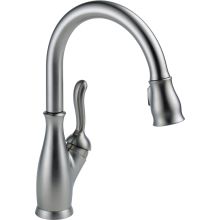
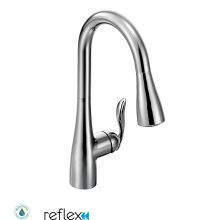
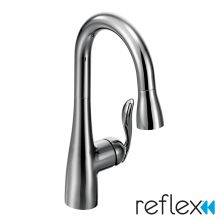
The kitchen faucet can be a gorgeous focal point as well as one of the most frequently used items in the room. What might come as a surprise is how many improvements have been made to this simple fixture, and what a difference those improvements can make in your daily kitchen routine. Thankfully, due to simplified processes, installing a kitchen faucet is now a DIY project. Most faucets can be installed with an adjustable wrench, some plumber’s putty, and Teflon tape. The manufacturer will include any special tightening tools that might be required for installation.
Note: These are general instructions. Actual instructions may vary slightly across manufacturers. Always refer to the manufacturer’s installation instructions.
Tools/Materials
- Adjustable wrench
- Plumber's putty
- Teflon tape
Much of the job will be done on your back, so you may want to have a pillow to cushion your back. A pan to collect water and towels are a good idea, along with safety goggles to protect your eyes. A flashlight will also come in handy. Remember to disconnect the power to the outlet below the sink, if one exists.
Removing The Old Faucet

Before you begin, you’ll need to remove your old kitchen faucet. To do this, you’ll need to go under the sink and disconnect the supply lines to the hot and cold valves. Disconnect the old supply line to your faucet. If you have a two-handle faucet, the water supply lines go directly to the hot and cold water valves. Unscrew the supply line connections first. For a single-handle faucet. Both hot and cold water connections will be part of the single spout assembly and built into the faucet, so mounting hardware is meant to slide directly over the lines. If there is a diverter (for a side sprayer), it will need to be disengaged before removing the faucet.
The old faucet will be mounted to the underside of the cabinet. Remove all mounting hardware from below, and the faucet should lift out. The area will need to be cleaned thoroughly to remove any remaining caulking and debris.
At this point, you most likely already know what kind of faucet you need, but here is a handy guide for how to choose a kitchen faucet, just in case!
Now you’re ready to get started.
Step-by-Step Instructions
Step 1

Assemble the spout according to the manufacturer’s instructions. Common parts found in this step are: O-rings, gaskets, metal washers, spacers, mounting brackets, and nuts.
If you’re installing a single-handle faucet, part of the assembly will include hot and cold valves. As well, many will have flexible supply lines.
Step 2

If you’re installing a single-hole faucet, insert the spout base and water lines through the hole in the sink.
A two-handle faucet will typically have a threaded shank coming out of each of the hot and cold valves. Insert these through their respective holes.
The mounting hardware usually connects to the shank(s) below the deck; screw the mounting nut until it’s a half inch below the surface. Then tighten down the mounting screws evenly until the faucet assembly is tight against the underside of the cabinet.
If the new kitchen faucet includes an escutcheon plate, apply some plumber’s putty beneath the edges of the plate, align the hole(s), and press gently into place. Wipe away any excess plumber’s putty.
Step 3

Hook up the supply lines. The hot water line goes on the left and the cold water line goes on the right. Tighten the lines with a wrench.
Wrap each valve with Teflon tape, clockwise around the threads.
Step 4

Secure all connections under the counter.
Begin by screwing each nut on by hand, then tighten it with an adjustable wrench. Secure the pipe for the water supply valve as not to damage any connections. Once you’ve finished one side, repeat this process for the other side.
Step 5

Test it out.
Now that the water supply lines are connected, turn the water back on for both hot and cold valves. Test the operation of the faucet, carefully checking to make sure there are no leaks. Tighten the connections, but do not over-tighten, anywhere you see drips.
Upgrading your kitchen faucet is an easy and economical way to give your space a quick design refresh, or complement a whole kitchen transformation. You won’t regret this DIY project!

