Flooring and Molding Buying Guide
From thresholds to bullnose, that new floor isn’t complete without the trim.

With today’s selection of modern flooring, installing a new floor is a surprisingly easy way to update the look of your home or office. You can have a new floor in a weekend, for just the cost of the materials and time. And yes, you’ll need more than just click-together wood planks. Before you close that cart full of new bamboo, wood, or vinyl planks, it’s a good idea to make sure you’re bringing home everything you’ll need for the upgrade project.
The important finishing touch on a flooring project is the right connecting trim and accent molding. These accessories complete the look of your remodel but also help ensure long lasting, safe results. No floor installation is complete without these flooring accessories, so make sure to have them at hand from the start.
Flooring Necessities
There are three kinds of accessories that are absolute necessities when it comes to finishing a wood or vinyl plank floor, even tile or carpet. Which combination you need will depend on the individual features of the installation area.
Transitions
Transition trim pieces keep everything in place, prevent debris from getting under the flooring to pry it up or weaken it, and add a visual bridge between one flooring type — color, pattern, or texture, etc. — and another. Each trim molding system will likely come with a track to help improve the fit and install the trim into the floor, making the task that much easier for the installer.

The purpose of transition trim is to help hold the planks in place and in shape, with no buckling or curling boards, just at the point where the new floor meets another room. They are used, for instance, in doorways, or when the dining room’s hardwood floor meets the living room carpet in an open floor plan layout.
They should sit snug enough to hold the flooring out of the way of foot traffic, but remain loose enough to allow wood or vinyl floors room to expand with humidity.
- Allow an overlap between ½” to 3⁄4” along the flooring edge to protect the gap.
- The flat top that overhangs the flooring should never be glued to the floorboards. The boards are specifically designed to float free and should not be mounted to the trim piece itself.
- A transition piece can be held in place by specific grooves in the trim and track, can be nailed into the subfloor, or glued along the bottom and affixed to the subfloor.

Flush Trim
Flush stairnose transitions are for creating an overhang off of nailed or glued wood floors, or for edging off floating stairs to glued steps. Also called bullnose trim, the flush trim provides a flat surface that lines up the floor with the rounded edge of a stair step.
The rounded front side forms the edge of the stair step and can be glued down or screwed into place before the floor is installed. The planks then line up into the back of the stairnose trim with their interlocking edges.
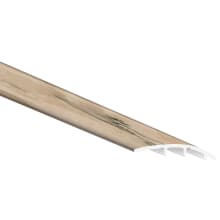
Overlap Transitions
Used for floating floors, overlap transitions work much the same as the stairnose trim, however, they do not have the interlocking connection. The trim piece is glued and secured to the subfloor directly. The floating floor sits snug under the overlapping top edge of the molding and is allowed to float freely in the space between the transition and the subfloor.

T-Molding
T-molding offers a flat transition molding between floors of even heights, such as in a doorway or between an open room and a narrow hallway. T-molding trim connects one floor to another while still allowing the planks to expand and contract by fitting into a track where the floors meet. Be sure to allow plenty of space for the track or t-molding base between different floors.
The center of the t-molding is applied to the subfloor directly, using adhesive and finishing nails. It fits snug between the two floors on either side, in a track only about 1¼” wide.
- The glue should not be applied to the flooring planks, to allow for expansion.
- The flat top of the T should rest on the floor tops, lightly pinching them in place.
If the trim is too tight in the track, it can result in creaking boards and broken trim over time. Plan your flooring to allow for a ½” or more gap between the floor planks and the trim or track.
If the flooring is thicker than the T-molding, cut a wood shim to run the length of the T-molding and glue it to the floor in the channel between planks. Glue the T-molding to the shim for the extra height to hold the trim in place.

Threshold Trim
Threshold trim, or end cap pieces are inserted in grooves alongside the flooring planks at a doorway threshold, or between different room floor surface types. Threshold trim also conceals the expansion gap allowed along walls, between a floor and the fireplace hearth, or the frame of a sliding glass door.
End Caps
End caps provide a rounded top edge and a flat bottom edge that can then be used to transition a raised wood floor edge to a lower floor, such as the raised height of installed tile to the thinner vinyl.

Reducers
With reducer trim, a curved edge provides a smooth transition between uneven floor heights. It is installed flush with the raised floor and is rounded down to the lower edge or the edge of the stair step.
Similar to reducers, adapters fit under one flooring type and flush against or overlapping the other, to create a transition, such as between carpet and tile, or tile and vinyl. The adapter helps to keep the transition point level with the rest of the floor surface so that it’s less likely to trip or present any other safety risk.

A flush reducer is intended to add a more gentle, flattened curve between a raised floor level and a floor that it overlaps, as between tile and vinyl. Tile has a raised profile while vinyl lays low and flat, so a flush reducer offers a gradual curb to avoid sharp, vertical edges that become tripping hazards.
Overlap reducers are used for bridging the required gap between floating floors and a lower level, such as with hardwood flooring and carpet. The raised top edge holds the boards loosely while the tapered flat base is nailed to the subfloor against the lower flooring.

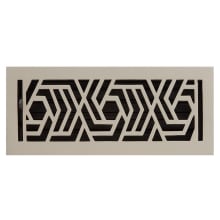
Vent Covers
Vent covers are tricky because they are still held to the same requirements of any other trim - the floor boards must be able to expand and contract. To do this, treat the vent the same as a wall or stair step intrusion into the floor space. Measure the floor opening and look for vent covers that will fit inside and completely cover the vent.
It's important to allow gap space between the flooring and the vent, so choose a vent design that overlaps the plank edges without requiring they be glued or nailed to each other.
Molding
Decorative molding is used for the same reason as the transition trim: it holds the flooring down at the sides and hides the gap. It completes the look of the room, adding the finishing touch by making the room seem taller with added vertical lines tapering to the floor, rather than end in a hard 90-degree corner.

Base molding, or baseboard, is the flat board trim, usually 1x6 or 1x8 board that is installed against and directly to the wall above the floor. The base molding keeps a seasonally expanding floor (like wood or vinyl) in place and prevents buckling. It adds decorative appeal and can be a simple board or it can be etched or tooled into ornate, repeating patterns that run the length of the base board.

The base cap is the length of quarter round that sits on the top of the base molding to round off into the wall. The base cap is purely a decorative addition that adds height to the molding and softens the look of the molding. They can be as simple as the rounded off edge of the quarter round board, or they can be patterned or scrolled with designs, for instance, to resemble ropework or leaves, etc.
Similar to the base cap, the base shoe is a quarter round that sits along the upper edge of the floor that bridges the space between the floor and the molding. The base shoe is glued or nailed to the molding and not to the floor. These are useful for adding extra overlap when the gap between the floorboards and the wall is too wide. A base shoe molding can also offer extra protection for the entire wall, as it helps prevent furniture from getting pressed up close enough to scuff or leave marks on the wall.
Shop Products